Friday, July 22, 2011

Let's Get this Garden Party Started

Okay then!

Today’s post officially launches phase 2 of our grand gardening effort. The effort began when we turned this:


Into this:


And this:

Into this:


Now we will turn the above view into something resembling this: 


The last photo, for you new readers, is of the tiny but terrific garden my husband and I built at our first house, between 2004 and 2009. (We loved it. But we couldn’t, unfortunately, have conversations in it because of the volume of traffic behind that wooden fence. )

So now we’re back to square one. Let’s review our mission as long as we’re here: to build a high-desert cottage-like garden that is crazy colorful without guzzling water.  Color Palette? Purple, yellow, and pink. (With some chartreuse thrown in to help yellow and pink play nicely.)
 
And since every epic journey requires a map:


This drawing depicts our backyard. The sections with crosshatching are patio. The guitar-shaped section is grass and the “hole” in the guitar is a raised fire pit. The horseshoe shaped feature on the right side of the main patio is a raised tree planter, and the pie-shaped feature in the left top corner is our raised vegetable garden. All the colored circles around the edges of the grass are shrubs and perennial flowers.

Which shrubs and flowers? I’m glad you asked. Time to introduce our cast of cottage-garden characters. Let’s start with the one I planted first: yarrow, or achillea.


This is ‘Apple Blossom’ yarrow, to be exact. Do you love her? I adore her. At least, so far I adore her. This is actually my first time planting yarrow, and it was only after planting that I discovered that the pink varieties-- known as achillea millefolium-- can be “vigorous to the point of weediness” according to my plant encyclopedia. Since “vigorous” is usually a euphemism for “invasive” I’ll have to let you know if this one turns into a thug as time goes on. For now, I’m in the honeymoon phase of the relationship, and I’m focusing entirely on her attributes.

Attribute number one: yarrow is drought-tolerant. So much so that, after planting, mine were looking sad and wilty until I backed off on water. They perked right up.

Two, this yarrow blooms a lovely deep pink but, as you can see in the photo above, each bloom changes to pale pink, and then to white, as it ages. The color variation between different blooms on the plant creates an effect similar to adding highlights to your hair: depth, dimension and interest.

Three, because of its nice flat shape (called “umbel” if you’re dying to know) yarrow is a magnet for beneficial insects including tachinid flies, lacewings, ladybugs, and the like.


 I planted a row of three yarrow, and each of them should grow to be roughly 2 ½ feet tall and wide. Here they are after planting.


They look quite prim and polite, right? Let’s hope future photos don’t show them swinging nunchucks and threatening neighboring plants.


It could happen. Fingers crossed.

Here is the map with the yarrow on it in pink:


Next plant: Gaura lindheimeri .


If fairies had a favorite plant, this would be it.  I purchased the above variety of gaura called ‘Whirling Butterflies,’ and you can see why. It looks like a cloud of white butterflies, especially when the wind blows. The photo above is from crocus.com. Here's another lovely one from Paghat's Garden.


Here's a photo I took of my baby plant where you can see the butterfly shape of the bloom:


Though I’ve heard this magical plant referred to as “wand flower,” around here, people use its Latin name, pronouncing it “GWAH-rah”. 

I planted four behind our cast iron fountain near our wrought iron fence. I chose this plant not only because it’s drought tolerant, but because of my love for contrast in garden design. Since contrast generates intensity, what better plant to position behind a cast iron fountain than the delicate, whispy gaura? I also wanted a plant that wouldn’t completely block the view behind the fountain, which includes distant houses scattered over the hills. Here is the view of the fountain from our main patio with the view of distant houses in the background:


Now, work with me here, and remember that these are baby plants. Here are my four gaura after I planted them.


I know, I know, you can't see them even with the yellow circles around them. This is one of the troubles with photographing an infant garden, especially when the plants are delicate. Work with me here. Use your imagination and try joining the first photo of a mature gaura with the photo of the fountain.


Can you see it? Isn’t it outrageous? By this time next year we should have a photo to knock your garden hat off.

Here is our map with the fountain in black and the gaura in white:


Anyone else have any experiences with achillea millefolium or gaura lindheimeri they can share?

Stayed tuned for more planting!


Tuesday, July 12, 2011

Now, Where Were We?

Cherished reader!

Glad you made it back. Glad I made it back, too. So much time has passed since my last post here at green out every window that I’m feeling pressed to account for my whereabouts the last two months.

 Let’s see, there’s been a little of this:


And this:

And a bit of this, too:

And this sort of thing as well:


 Of course, there’s been some activity in the garden, too, but all of the activities pictured above made post-writing nearly impossible.

At this point, some quick updates might be the best way to get us back on track.

Let’s start with those birds.

After home-made bird scarers failed to frighten the friendly quail who were gobbling up my veggie garden, I bought a plastic decoy hawk online. The result?  Success. Here’s a picture of my upper veggie bed (with home-made scarer) that was being repeatedly munched by quail back in May:


And here is the same veggie bed now:


Mr. H. Decoy’s presence in the garden has also spawned some rather amusing behavior on the part of the quail : Hawk Watching.  Observe:


I’ve only seen solitary males engaging in this entertaining ritual. I know I’m anthropomorphizing a bit here, but I can vividly imagine them daring each other to get as close to the hawk as they can while their female companions roll their eyes.  From my window it looks like a single male quail sitting perfectly still on the fence while looking at the decoy. Then he looks away, and looks back at the decoy, then looks away again, and looks back at the decoy. He keeps this up for some time (whatever time he’s agreed to with his buddies) and then flies off.

Today, the quail plot at our house thickened all the more. While removing the mulch from around the base of a boxwood I was getting ready to transplant, my gloved hand happened on what felt like a pile of very light rocks, but turned out to be a nest full of small, speckled eggs. 


Quail eggs, of course.  I can only imagine it was the father’s idea. After all, this location greatly shortens the commute for his new, favorite pastime: Hawk Watching.  Our yard's status has been upgraded from quail salad bar to all-inclusive resort.

Now, back to that tomato I sprouted from a supermarket tomato seed. Sadly, said tomato seedling became exceedingly yellow and stressed while waiting to be planted. In the end, I didn’t get him in the garden until about 2 weeks ago, again, due to the fun  mentioned at the start of this post.  Here he is now.


Teeny, huh?  And here’s the seedling I started from the grocery store bell pepper seeds:


 I doubt either of these plants will have enough time to set fruit before the frost, but I’ll keep you posted.

Now, remember my hardening off disaster? Well, believe it or not, several of my beloved poppies (seven out of the 14) responded to my last ditch effort to revive them with careful watering.  Even though I had to repeatedly cut off leaves that turned yellow or brown as the seedlings came back to life, they made it back from this:


To this:

They’re now planted around my crabapple tree in the backyard. Unfortunately, my timing is WAY off with these guys as well. They're technically a spring flower, and since weather prevented planting until the second week of June, they’re just now getting going and it’s wicked hot outside.  Perhaps too hot for them to bloom.  Only time will tell. I’ll let you know.


Most of my other seedlings are in the ground as well, and doing fine, but don’t deserve a photo until they’ve made a little more of themselves.


In other news, someone please get me some sauce to eat with my big plate of crow. After vehemently insisting, back in April, that a Ghost Chile plant would never bear fruit in an aluminum beverage can (as the Magic Plant Company would have us believe) I must admit that I was mistaken. There it is: They are right. I am wrong. As a reminder, I was so convinced their system wouldn't work that I  diligently removed several sprouts from their can to grow in “better” conditions, I am embarrassed to admit that my best seedling looks like this:


And the Magic Plant Company Ghost Chile in the can looks like this:


I guess the rule for TV pundits applies to bloggers as well: The more emphatic you are in your predictions, the more likely you will be proven wrong. Mmmm, crow, yummy.

Let’s return now for a minute to my plan to attract beneficial insects to my garden after a devastating experience with Bayer systemic fertilizer and insecticide.  So, has the introduction of yarrow and a daisy-like coreopsis to my garden (both reputedly loved by beneficials) brought more good bugs on board? YES!

Both began to attract various sorts of flying critters while still sitting in their nursery pots in my backyard. Here's the coreopsis complete with beneficial bug.


 After consulting my Audubon Field Guide to Insects and Spiders, I’m convinced this is a tachinid fly, a beneficial insect whose larvae become parasites on the bodies of pest insects, eventually killing them.  I admit I was a dismayed at the extent to which these tachinids resemble house flies. Not nearly as romantic as ladybugs and green lacewings, but so be it.

On the other hand, I felt a bit giddy when I discovered this lovely fuzzy insect sipping nectar from my newly purchased pink yarrow….


…until my Field Guide informed me that it’s a large bee fly, which looks innocent but is a sworn enemy of solitary bees. The cunning bee fly follows the bees home to their nests, and then, after the bees have departed, lays her eggs in the entrance tunnel. When the dreaded bee fly larvae hatch, they devour the bee larvae! So, not such a great bug afterall. But oh well. This is where we bow in deference to the garden food web, and just let it be.

Finally, a quick update on my free Arbor Day Foundation trees. The crabapple that delighted me when it woke up and put out leaves in March didn’t make it. I was afraid to put it outside in the March cold, and I believe the lack of light in the garage did it in. Here’s a picture shortly before it’s demise:


Of the remaining four trees, only two others came to life. Of those two, only one looks like it will make it. Here is the eastern red bud  treeI have little hope for:


And the crape myrtle that I’m rooting for:


That’s the wrap. Thanks for reading!

Thursday, May 19, 2011

For The Birds

I have a new gardening gripe to get off my chest. And it isn’t the gripe that has to do with the May 15 frost deadline having past, but it still being too cold to plant. I know a useless gripe when I see one.

No, I would file my latest gardening complaint under the heading of “Be Careful What you Wish For.” Actually, “Be Careful How You Decorate Your House” might be better.

You see, I have this thing about birds. Real ones, yes, but also decorative ones. My house, in fact, is  populated by a flock of decorative birds.

There’s this one:


And this one:


These, too:


And then there’s those other ones:


And the one in the cage:


Did I forget to mention the ones on the bedroom wall?


I also own a bird identification guide, a book with digital recordings of bird calls, and an iPhone app that plays birdsong for relaxing soaks in the tub. It’s fair to say that, before this spring, my romance with birds was in full swing.

Then, it happened. As I waited for my backyard crabapple to dazzle me with its blooms, the house finches devoured the buds before they opened. (My local nursery-owner tells me they were after the nectar). Then, as if part of a coordinated avian attack, the quails started helping themselves to my newly planted lettuce and spinach. (Apparently, says the nursery owner, they need greens in their diet). Suddenly, I’m having a hard time loving my feathered friends. My next task: how to unfriend the birds.

Remember Beatrix Potter’s tale of Peter Rabbit? For the first time, I feel much less kinship with the radish-eating bunny, and much more with the grumpy, rake-wielding Mr. McGregor. But we don’t wield rakes at my house. It’s not good for your back. And so far, we don’t cover the raised beds with nets or plastic, because that’s just not attractive. I look at the vegetable garden through the bedroom window, so I require it to be as pretty as it is productive.

So, we make bird scarers.

I got the idea from my favorite book about gardening with children: How Does Your Garden Grow? by Clare Matthews.  Here’s a picture of a finished bird scarer from her book, made from wooden dowels, old CDs and paint:


Charming and whimsical, right? Supposedly, the birds don’t think so. The CDs twirl in the wind and throw off flashes of light that birds can do without. So we got busy making scarers.

First, we painted our CDs:


Here is the set of eight that Benny and I finished, enough for two bird scarers:


Then I used a hot glue gun to attach the CDs to a small wooden dowel:


(Matthews, who is British, actually recommended that you use PVA glue or silicone sealant. If you know what those are, I would recommend you try them. In the end, the hot glue actually doesn't hold up well to the temperature fluctuations outside. I've since rigged a solution involving fishing line, but if I were you, I'd just get some better glue)

Finally, I cut newspaper rubber bands and used them as strings to attach the CD stick to another, larger dowel. Matthews said to use elastic thread, which I've seen but wouldn't know where to buy. (But in the end the rubberbands weakened and snapped, so I bought some "stretch cord" which I found among beading supplies in the craft store.)

Here is one of the scarers hanging from an iron topiary in the top portion of the veggie bed.


Did they work? Well, I’d love to say they did. And to be fair, they did seem to work, somewhat, some of the time. I’ve seen finches veering wildly away after flying too close to the spinning discs. But the quail, well….


Yes, that's a picture of a quail scarfing down romaine lettuce with our super-duper scarer hovering at the top of the photo. And that's his lady companion down in the soil on the left having a go at the spinach. I had to run out and chase them away after all. (No rake).

So our greens, which have been in the ground for over a month now, have so far not made it on to our plates. They've all gone to the birds.  Needless to say, I need a new strategy for those darn quail.  I was starting to think a decorative metal bird to the head would do the trick. Then I remembered that, before this spring, I actually loved the quail. They’re by far the cutest, fattest, most adorable birds on the block. They act more like humans than any other bird I’ve seen. They prefer to walk rather than fly, and they run around the neighborhood in these giant family groups with children in tow. The adults are rarely seen without the company of their significant other. I don’t want to hurt the quail, I just don’t want them mistaking my veggie patch for a salad bar.

So now, I’m going to deploy a Super-Duper-Ooper-Schmooper Scary Scarer. 

Meet my new decoy hawk:

Bird-B-Gone Hawk Bird and Rodent Deterrent - 17in.H, Model# MMRTH1

It set me back $15 and should be arriving in the mail within two days (All Hail to Amazon Prime).  I was tempted to purchase a motion-activated decoy owl that rotates it’s head and hoots, but the hawk actually got better reviews. Hawks are also more numerous in our area, and unlike owls, they hunt during the day, which is when the quail come a callin'.

Now, am I going to love seeing a plastic hawk out my bedroom window? I’ll have to get back to you on that one. If this doesn't work, I'll have one last tactic to try:  Buy my greens at the grocery store.

Anyone else have bird problems that they solved in an aesthetically pleasing way?

Tuesday, May 10, 2011

A Tomato of One's Own

A funny thing can happen when a city-dwelling, flower-growing, farmers-market-frequenting gardener like me decides to buy vegetable seed from the local nursery. I think it’s best likened to a trance. Or perhaps a spell. Some sort of hypnosis, maybe.

But standing before those glorious seed racks, I become transfixed by the perky packets. I listen intently to their promising rattle, and gaze at their colorful, come-hither pictures. One packet shows me peas bursting from their pod. Another, plump tomatoes clinging to a vine. Somehow, I come to believe these envelopes contain a special magic, some rare substance whose provenance is distant, romantic, and charmingly agrarian.

It’s only once I’m home, shaking the seeds into my palm, that the spell breaks. Then I stare, in quiet disbelief, as a simple question crowds my mind:


Did I really think tomato seeds from a packet would look any different from the ones on my plate?

Another open envelope leads to another, alarmingly-obvious realization:


Pea plants are grown from… well… dried out peas!

And finally:


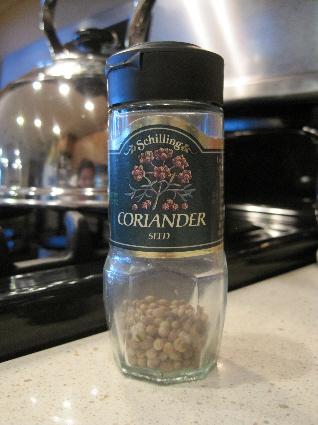
Why did I just spend $2 on a packet of coriander seeds when I have a jar of them in my spice drawer?


The disconnect is as ridiculous as it is real. Part of me is embarassed, and another part says, well, can you blame me? I can’t be the only gardener ever to have fallen into this bizarre trap-- what I've come to think of as the Vortex of Consumer Kitchen Gardening.

When you’re in the vortex, it seems like the “stuff” of starting a vegetable garden is some “special stuff” you can only get from a store, rather than the “ordinary stuff” your kitchen happens to be filled with already.

Though I don’t know how this disconnect happens, I imagine grocery stores have something to do with it. After all, when produce is piled, Wharhol-like, in neat, monochromatic stacks, it suddenly becomes a strange object unto itself, a beautiful article of food, rather than something that was ever connected to a plant, or a field, or a seed.


Credit: dreamstime.com
But never mind. The point is, if you love fruits and vegetables enough to want to grow your own, then you probably have a lot of the raw material you need to get started.  Like in your refrigerator.  Or maybe in your fruit bowl.

As for me, I took one look at those tomato seeds from the packet, and instantly knew what I had to do. After planting the Better Bush seeds that cost $3.49 for the envelope (from which I only used 6 seeds,which were thinned down to two plants.) I grabbed the last soft Campari tomato from our kitchen fruit bowl and sliced.


I mean, what did I have to lose?
I removed the seeds, let them dry out on a paper towel, then pushed them into a peat soil pellet. I placed them, in a baggie, under the lights with my other seedlings.


A few days later I had this.


Today, after thinning and repotting into a 4 inch peat pot, my kitchen tomato plant looks like this:


After doing a minimal amount of web research, I’ve found there is some debate as to whether Campari tomatoes from the market can be mined for seeds and grown at home. Some claim that, because it’s a hybrid tomato, it won’t produce a true copy of itself from seed. But at least one other gardener has claimed success as you see here.

If it works, it really provides some food for thought, so to speak. After all, a container of Campari tomatoes costs roughly the same as the envelope of tomato seeds, and contains far more seeds. And since I buy the tomatoes already, the seeds actually cost nothing.

But seeing those tomato sprouts gave me all sorts of other ideas.

Here’s my infant Gala apple tree, sprouted from a seed I plucked out of an organic apple before eating it.


If this sprout succeeds, I think I’ll pot it up along with my Arbor Day Foundation trees.

Then I started thinking about the Organic sweet peppers I pay $4 per package for.


Yum, right? Seeds from these took a while to germinate, but if you look closely, you can see the greenish/purplish stem emerging.


The only factor that might rain on my produce parade is our relatively short growing season in Northern Nevada. If these babies require many, many months of warmth and sun before producing a harvest, I could be in trouble. I’ll keep you posted.

Any readers out there have successes or failures to share after using kitchen seeds in your garden?