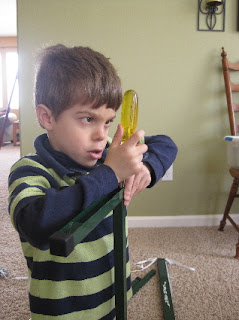
Fortunately, this was not a difficult task. Though my failure at a simple mechanical assembly would have made for an interesting blog post, the truth is, it was easy enough for a five-year-old to do.
Right Ben?
Ben?
Okay, two five-year-olds, then:
Show us your work, boys!
(And yes, I know Ben has serious bedhead, but we’re keeping it real...)
After the legs were done-- which only required one screw and two washers each-- attaching the top bar was a simple matter of lowering the square shaped compartments in the top bar down onto the square shaped legs. Voila!
Now, notice the silver rings hanging down from the bar, because they’re going to come into play in a minute. But first I had to snap two metal clips onto the back of the fluorescent bar between the painted arrows like this:
Then I slipped those silver rings hanging from the top bar onto the metal-clip hooks like this:
And I was in business!
The light definitely came out a little cattywampus, but it was easy to straighten by fiddling with the middle lanyard and toggle at the top.
This feature is really the key to the whole contraption, since moving that toggle up and down the central cord is what lets you raise and lower the light. That's how I'll get the flourescent right down on top of my little seedlings once they poke through the soil, and then I can move it up as they grow.
Now, of course, I still needed to turn it on. All I had to do was insert this plug….
…into the socket on one end of the fluorescent rod:
AND.......
(You could start humming the tune of “This Little Light of Mine” for full effect)
TA DA!!!!
There you have it, folks! Is that exciting or what?! I mean, who needs cable, right?
Now, although lighting up my carpet was pretty exciting, I had to immediately grab my seed tray so I could really start fantasizing…
YES!
Come on, now, your heart’s racing a little, right?
No?
Well wait till you see when I put the top on the right way:
AWESOME!
Right?
Not doing it for you, huh?
Okay, well, my kids loved it. But mainly because of that fun switch you can see on the cord in the picture. And also because the boxes that came with the kit made a GREAT HotWheels tunnel.
See, isn’t gardening fun?
Next post: “Seeds, meet my good friend Soil.”


SO good. Love that Ben and Issac helped...they are already blogstars.
ReplyDeleteThat looks great, Bel. And with all that talented help putting the system together I'll bet you start seeing mega plants in the very near future.
ReplyDeleteI really like the system you got. It acutally looks like something that I might be able to put together, myself, without having to call the local "handyman".
So, where can I get one of those lighting systems? It's now been over a week since my tomato plants have seen any sun and they're getting awfully droopy and starting to shrivel up. I don't think they're going to make it much longer.
Kids really do just need boxes. Mine have been entertaining themselves for days with one.
ReplyDeleteIf any other readers are wondering, the lighting system I got (which cost me $83 at a local nursery) is now on sale on Amazon for $41. Just look for "hydrofarm 2 foot light system" in the search box.
ReplyDeleteLooks great! The step-by-step instructions are really helpful.
ReplyDeletelouis vuitton, longchamp pas cher, oakley sunglasses, louboutin outlet, replica watches, oakley sunglasses, louis vuitton, nike free, louis vuitton, ugg boots, oakley sunglasses, ray ban sunglasses, longchamp, ray ban sunglasses, cheap oakley sunglasses, kate spade outlet, prada outlet, polo ralph lauren outlet, louis vuitton outlet, longchamp outlet, replica watches, louboutin, christian louboutin outlet, air max, gucci outlet, air jordan pas cher, nike roshe run, oakley sunglasses, tory burch outlet, ralph lauren pas cher, nike air max, jordan shoes, nike air max, louis vuitton outlet, polo ralph lauren outlet, prada handbags, michael kors, uggs on sale, chanel handbags, louboutin shoes, ray ban sunglasses, nike outlet, longchamp outlet, tiffany jewelry, nike free, louboutin pas cher, sac longchamp, ugg boots, tiffany and co, burberry
ReplyDeletereebok shoes, hollister, soccer shoes, ralph lauren, gucci, babyliss, lululemon, herve leger, louboutin, birkin bag, lancel, jimmy choo shoes, nike huarache, bottega veneta, soccer jerseys, vans shoes, hollister, baseball bats, new balance, ghd, iphone cases, nike air max, giuseppe zanotti, chi flat iron, north face outlet, vans, ray ban, timberland boots, p90x workout, abercrombie and fitch, insanity workout, ferragamo shoes, wedding dresses, nike roshe, hollister, asics running shoes, longchamp, celine handbags, instyler, oakley, nfl jerseys, mcm handbags, converse outlet, beats by dre, mont blanc, valentino shoes, nike trainers, mac cosmetics, north face outlet, nike air max
ReplyDeleteugg,uggs,uggs canada, wedding dresses, louis vuitton, pandora charms, pandora jewelry, louis vuitton, marc jacobs, moncler outlet, moncler, canada goose, supra shoes, canada goose uk, moncler, links of london, moncler, karen millen, moncler, toms shoes, pandora jewelry, doudoune canada goose, replica watches, moncler, juicy couture outlet, moncler, swarovski crystal, canada goose, pandora charms, juicy couture outlet, canada goose, coach outlet, bottes ugg, louis vuitton, ugg,ugg australia,ugg italia, thomas sabo, swarovski, canada goose outlet, montre pas cher, louis vuitton, ugg boots uk, canada goose, hollister, canada goose outlet, sac louis vuitton pas cher, moncler, ugg pas cher
ReplyDelete. Lucky me I came across your website by chance
ReplyDeletehttp://www.kuwait.prokr.net/